INDEX
Restoration History
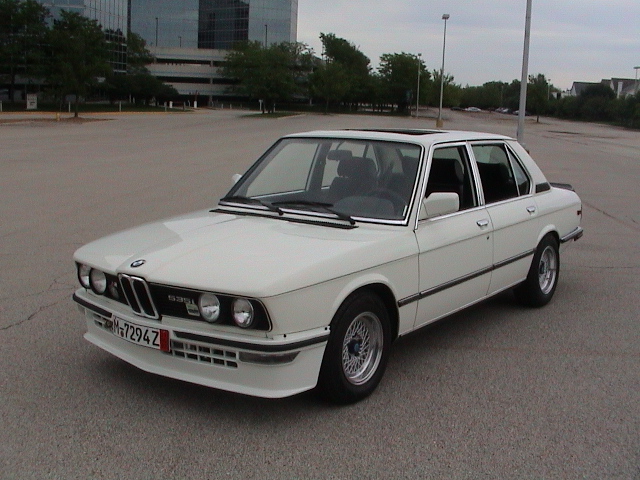
1980 M535i
Post-Rebuild
"On the road again... I can't wait to get on the road again..."
July 2005 – August 2005
Once the engine was back in the car, there was still a lot of work to be done and many items to check off the to-do list. The previous update showed the remounting of the exhaust and made mention of the tranny re-installation and driveshaft. With that done, it was time to concentrate under the hood.
I took the intake back to the machinist that had built the bottom end for me. I decided to avoid the media blasting of the other place (sand) and have the machinist do it with their safer environment. They use a mixture of a hot tank with chemicals and some kind of engine-safe baking soda mix to clean. It was more expensive, but the results were worth it on all of the intake runners and log manifold. I then immediately clearcoated all of them to prevent oxidation.
After the installation of the manifold pieces to the head (new gaskets in between of course), it was time to mount the fuel injectors and fuel rail. The injectors were sent out to injector.com to be cleaned and balanced. The flow test indicated that there was a good improvement there. Once the injectors were mounted, I began mounting the intake runners and log manifold. This was all fairly straightforward but I did have to make two trips to Patrick BMW in Schaumburg (whom I’ve been using in the last two months of this process to get lots of little parts, nuts, bolts, screws, washers, etc). I used all new hardware to mount the intake but I didn’t have enough at first to remount it all. It looks fantastic with the correct hardware and having it all shiny to match the clean intake. For pennies for each nut and washer, it really is a worthwhile thing to do when finishing a project like this.
A new cooling hose kit was sourced from BMP Design and all of these were remounted on the car as well. I tried to use new hose clamps wherever possible but there are still a few old ones hiding in the engine bay. I also used new vacuum hoses source from Patrick BMW and of course all new belts. I got a bit lazy when mounting the airbox that houses the air filter as you can see in the pictures that it isn’t spanking clean. But that is easily removable and I will clean it up later. I was getting anxious to start her up!
For the initial oil to break in the engine, I put in standard, Castrol 20w50 dead dinosaur juice ( no synthetic). For cooling I put in ONLY distilled water that I bought in jugs combined 50/50 with BMW’s engine coolant. No corrosion in this new motor, thank you very much! Then there was the wiring to figure out and it took me a while, which much help and pictures from those on the firstfives list to make sure everything was in place. I also tried in a few places to wipe off grime and gunk from the wiring harness but it isn’t perfect. Maybe it should be replaced later?
I also didn’t want to re-use the old oil cooler lines as they were in poor shape and were quite grimy. Also the fittings were marked up when I removed them with adjustable wrenches and vise grips (they were really on there tight after 25 years). I had a local hose and fitting place make copies of them in braided stainless steel with new fittings and I think it was money well-spent. I added an oil filter and it was time to get things going.
Or not …. I had a bitch of a time getting the timing right and after a few days of trial and error, a friend came over and helped me out. It’s a finicky business and as I found out later, I was timing it on the TDC of the exhaust stroke. We finally got her to start, but I had a massive vacuum leak from not getting the valve cover gasket on right! DOH! That fixed, she would idle at least and I was able to drive her around the block.
This brings me to the present. The timing still needs to be set to the right setting, but the timing light I bought isn’t much help since the aluminum flywheel doesn’t have the little “ball” mark on it like the factory one to time it. I’m going to have to get it set by the Windy City BMW chapter’s Ben Thongsai who has done work on my cars. I’m kind of pissed and frustrated at the same time after the last drive through the neighborhood where the idle was all over the place and everytime I wanted to get some power, the engine would try and stall. It was an interesting ride for about 3 blocks to get back home. So right now she idles and will barely drive which is where the pictures in the driveway outside the garage are coming from. Ben should be coming over to make a house call and hopefully get her sorted out. I’m shooting for a vintage car day through the BMW CCA here in Chicago at the end of August.
I will do a more final wrap-up on this ordeal when she’s running and driving normally so for now I’ll hold off. For the brief time I drove her, the new suspension felt fantastic though. In the pictures at the bottom, I avoided the driver side because there was a long shadow cast by our tree and the pictures looked horrible, as half the car is visible.
Mid-August 2005
Well, I’ve put a few miles on her and have been slowly venturing forth further from home. Short drives taking it easy and shifting around 3K rpm. She feels like a completely different car, the suspension is taut and feels great and the engine is lively and responsive. I can’t wait to be able to floor the gas and really feel the power.
At least the idling and timing issues are fixed now. I had Ben Thongsai from the Windy City CCA chapter make a house call and he set the timing for me. He also found out that my wide-open-throttle switch is bad so she’ll run fine without it as long as I’m not putting the pedal to the floor (which I’m not). I need to get a new switch though and take care of that issue. I took these pictures today, August 14th, while I had her out for a bit. So far she’s seen about 20 miles since the rebuild was finished. I still have to replace brake lines since the driver side front is leaking and I also still have a really annoying leak at the timing chain tensioner. I think there’s a crack in the lower timing chain cover which will be a bitch to fix.
September 2005
In the process of changing the oil after the initial break-in. I did 275 miles and I thought that was sufficient. Part of that included the Windy City BMW Vintage Day 2005 that I took pictures of (featured in the Events section of my website). These photos were with my film camera and were put on a photo CD. They are much higher quality than my 1 megapixel digital camera so I thought I would post them. I plan to use one to enter the Bavarian Autosport yearly photo contest so wish me luck.
December 2005 – February 2006
Since getting the car back on the road last summer, I’ve been increasingly disappointed with the look of the original 14″ wheels. Also, the handling of the wheels and tires was not up to the level that the chassis was capable of. I’ve always lusted after a set of vintage, open-lug Alpina 16×7/16×8 wheels but abruptly something in me snapped last Fall. These are admittedly beautiful wheels, but they always trade at a huge price premium that I have never felt was completely justified. Figure $1500 for a nice set. I had always planned on buying a set that needed refinishing because I wanted to powdercoat the centers and do a silver lip. However, I came to the conclusion (very suddenly) that I would rather have BBS wheels on my car, and the ones I wanted were the three-piece RS type.
I can blame Zane Coker and Peter Pratter for this disease. I kept looking long and hard at their BBS RS wheels eventually deciding that I really wanted to do the same thing although not quite as wide. Both of them are running 10″ wide rear BBS RS wheels with a 245 stretched over that which required rear-end modifications for fitment. No, I was willing to roll my fenders, but that was about it. I also didn’t want the BBS RS sizes more commonly found in the United States, which are 16×7/16×8. After researching through Peter and Zane and learning about the vibrant trade going on over at ebay.de in these wheels, I decided to look for a set. I wanted a set of 16×8 et11 front and 16×9 et24 rear to be a little different from the crowd. These are the same offsets as the Alpina open lug wheels which work perfectly on an E12. I had a feeling that even with the wider widths, these offsets in a BBS RS would work as well. I also wanted a set of these wheels with black centers and a polished lip. I knew finding this exact set on ebay.de would be slim but I was looking anyway. Eventually a set came up on ebay.de that were very close, but with a 20mm front offset which I couldn’t use. I emailed the seller and it turns out he can get near anything for you through his connections so I had him “build” me a set to my specs and refinish them with black centers. His name is Markus and he’s a regular on the E30 M3 website, s14.net. I can put you in contact with him if you are interested in a set of these wheels for your own.
After waiting for weeks to have Markus locate the right set of wheels, then take them apart and refinish them, reseal the three pieces and rebuild them (torquing to the right specs), they finally arrived Feb 6th. They were so beautiful! I skimped on rubber for now since I didn’t want to blow $800 for a set of Bridgestone S03’s like I wanted. I bought some used Dunlop SP8000’s which will be fine for my current amount of driving (2500 miles a year, usually much less) until I feel the need to replace them. Sizes are 225/50/16 front and 245/45/16 rear. The pictures on the right speak for themselves. I think the car looks stunning although the look isn’t for everyone. Most agree that the black centers look good on the white car, but they are very shiny and make a statement. Some feel that this statement is wrong on the car.
A few points of clarification in my defense for this modification. These BBS RS wheels are vintage 1980’s and would have represented a typical aftermarket addition by a BMW 5-series owner in that decade. Whenever I have done modifications to my car, I have tried to think “What would an owner in the first few years of ownership have done to the car, particularly in Germany?”. That is why my car has Alpina springs and some other items that in my opinion are “period correct modifications”. It’s a fine line, and my rule has always been that the mods should be reversible. Ah, but you point out, fender rolling is NOT reversible. Very true, and this was a difficult decision to make. However, my E34 M5 has rolled fenders from either the factory or a previous owner in Germany. Done right it is very hard to tell this is done without running your finger inside the fender wells to check. So I decided that I could live with it and it would be an o.k. modification for the car. Fender flares and extreme cutting would not be!
To close, the fender rolling still has to be done. The fitment of the wheels and tires is beautiful, but they are very close to the front strut and the rears are very close to the fender lip. I also need to install the rear camber kit I already have to hopefully “tuck” the tops of the tires in the fenders. Also I’m unhappy with the ride height even with the supposedly “very low” Alpina springs. I need to get the front lowered somehow. Finally, I have the rear subframe mount stiffeners on order from BMP Design (cheap insurance, $35) to keep the rear subframe from shifting and having the tires rub, even with rolled fenders. I’ll tackle the fender rolling in the Spring (I need to borrow my friend’s 14″ wheels and tires from his E12 to drive the car somewhere for the rolling job!).
Spring 2006 – June 2006
It’s been quite a while since I posted an update on the car. The main news (which is kind of old now) is that I did get the wheels to fit on the car and it is driveable. It was quite an ordeal though. First off, I brought the car to Patrick BMW’s body shop in Schaumburg and talked at length with the estimator about the car, it’s rarity, and my requirements. I also got to meet the guy who was going to do the fender rolling and does all of the fender rolling jobs at their shop. He had never done an E12 though, mostly E36 and E46 M3 racecars. Still I liked both guys a lot and they were very respectful of me and the car. Unfortunately, due to no fault of their own, the fender rolling didn’t go that well at first. The passenger side rear fender had paint chips nearly all the way around. Fine, I guess I sort of expected that. But the driver side rear fender had hidden rust and bondo!! More dirty little secrets of my poor car. What happens in this case is when they attach the fender rolling tool to the hub of the car and it starts bending the metal, good metal bends well with the proper coaxing. Bondi/filler is rigid and doesn’t bend, so you get a crunched up fender like mine. Again, the guys at Patrick were awesome and this was not their fault. More joyful things to find out about my car from her previous history.
Unfortunately I’m not at the point to fix this properly so I told the guy at the body shop to use filler (it was already there before anyway and I never knew) and paint it and make it right. This required painting of the quarter panels on each of the rear sides of the car. The paint looks good but doesn’t quite match due to age and fading. Again, the car needs a full repaint and resto at some point but I got my main goal accomplished, the big wheels and tires do fit!
So how does she drive? Well…. on smooth roads the ride is very firm and taut. On bad roads ……… she rides like a truck!! But wow, wow, wow, the car sure gets some stares now at traffic lights. Cool stuff. Also the handling is a bit better, but at the expense of heavy steering of course. I’ll be the first to admit that this mod is overkill, and at the expense of some of the old character of the car, but wow the massive footprint and gorgeous 16″ BBS wheels make it worth it. The car got lots of attention at this year’s 5er Fest Event and it was 90% because of the wheels. They drew quite a crowd.
As prep for 5er Fest, I did a few other things including new front wheel bearings (because of the big wheels and tires), cleaned up the trunk finally and put all the panels back there since I had never put them back (the rear seatback panel’s vinyl, the shock tower covers, etc). I also did some liberal POR-15 rust repair back there before putting it all back and also did some in a few other areas that I knew needed a dose (under the doors for one). These are areas I’m not concerned about since they will get fixed with either welding or new panels eventually, and I don’t drive the car in anything except perfect weather anyway. Still, it helps to have POR-15 on there keeping the rust at bay for a while.
Yes, in the night picture of the car, those are sucky US-DOT headlights in there. I haven’t replaced my yellow Cibies yet that used to be in there. It’s coming at some point when I get the cash to do what I really want. Also this summer I might try sealing up and painting the fuel tank as a “dunright” disease item on my list. Until next time!
Fall 2006
This update is a bit old, but I’ve been meaning to add it. Several months ago I upgraded the lowbeam lights on the M535i to real Cibie, flat-faced e-code lights. The stock, (original I think??) Hellas are still in the highbeam sockets for now to cut costs, but the $5, sealed beam Pep Boys US DOT lights and their dim nighttime glow, were bugging the crap out of me. Also considering the general look of the car with the BBS wheels, spoilers, and euro front plate, it did not work with leaving these cheapo headlights in there. So I opted to get the Cibie lights again because of the quality and reputation for older euro-car lighting. Eventually I’ll change out the highbeams as well.
The reason for choosing the flat-faced lamps was of course for the addition (in the future at some time) of the original, headlight cleaning system with the washers and wipers. The flat-faced lights are required for this.
April 2007
Well, Spring is here in Chicago ($@#$%!@, FINALLY!!) and before 5er Fest 2007, I had quite a few things on the to-do list that had to get taken care of. First of all, I needed to put the fuel tank back in the car after cleaning it up, sealing it, and painting it according to instructions found on Keith Kreeger’s website, my2002tii.com. Here is the quick synopsis of what I did.
To start, I removed the fuel tank from the car and I was able to see that the BMW part # sticker was still visible by the filler neck. Although heavily soiled and degraded, I could make out the last few numbers of the part # and verified them on the parts CD. The reason? Because the E12 M535i, as a euro car, had a 70 liter fuel tank. US-spec E12’s had a 63 liter tank. The previous owner of my car was not always diligent about replacment parts with the correct oem versions, and he had told me about replacing the fuel tank in the car before I bought it. So I assumed that he had taken the easy route and put in a US-spec E12 fuel tank. This is, thankfully, not the case.
The fuel tank was actually in pretty good shape which also confirmed it had replaced the original one in the car. But this project was about making it even better. The first thing I did after draining all the gas was to clean it up and apply a coating of POR-15 to the outside of the tank. I used the clear variety. The reason for this is not just rust-proofing, but also for the added strength that POR-15 provides. The fuel filler neck on these tanks can break or split open and the POR-15 should help prevent that from occuring. After this I found a competent radiator shop to boil out the tank to remove any impurities inside. Again, this is all following advice given on Keith’s 2002 tii restoration web page. The radiator shop’s process did remove some of the POR-15 from the outside, so I put on another coat. The more the better I suppose.
The next step was using the POR-15 tanksealer that I bought which involves dumping it in the tank, sloshing it around many, many times, and then trying to drain the excess out. It’s a lot of work. It took several days for this to dry inside the tank, but it left a nice, silver finish inside the tank that should be free of any rust starting. Then I purchased a can of 3M Rubberized Undercoating paint and applied this to the underside half of the fuel tank. The top half got some 3M black paint to make it more presentable. The results are shown in the pictures.
After the fuel tank was put back in the car (with a few things replaced as long as we’re in there, including a new fuel pump, new exhaust shield by the fuel tank and rear muffler, new gas cap, and new rubber filler neck surround piece inside the fuel door), I got going on a few other items. I installed the 220kph speedometer that I had redone by Palo Alto Speedometer. It was set to the kph equivalent of the mileage the car had on the odometer it came with. The 220kph version was used since the 1980 E12’s had this, and the 1981’s had a 240kph speedo for some reason.
I also installed a new transmission mount that I’d been meaning to do, new plug wires from BMP Design, and installation of an I-cut-it-to-fit new hood pad also by BMP Design. Finally, I changed the oil for the first time since the engine rebuild (I changed it 250 miles or so after the rebuild, but I had not done it since then, about 2K miles worth).
There are still a few items on the list. The car needs an alignment because the inside front tires are already worn out and I’m not running *that* much negative camber. Also, before the alignment, I need to finish cutting the last 1/4 coil off my Racing Dynamics front springs. I cut 3/4 of a coil off and then with help from Dave Rutkowski, realized that the suspension geometry was off because of the spring perch. So I still need to get around to doing this, but the car rides great already!
I’m so glad I ditched the Alpina springs. The handling in the front of the car sucked; it was floaty, underdamped, and sat way too high. Right now with the Racing Dynamics springs I sourced after selling the Alpina springs, the ride is very taught and the car is LOW. Once I get the last part of the springs cut in the front, I’ll re-attach the front sway bar links (yeah, I’ve been running without it), and then get some new tires for the front and rear of the car prior to an alignment to get it all straightened out.
I absolutely have to take care of the oil leak from the engine rebuild by the timing chain covers. I am SO SICK of the car leaking oil from there and I need to bite the bullet to take this apart and get it fixed. It’s tough to get motivated also because the car is fast and a blast to drive, but then has this damn oil leak.
Today, the 15th of April, I had the car out quite a bit and took my son Declan for a ride in it (in his child seat of course). Before our ride, while he was napping, I polished the wheels to remove oxidation and grime from sitting in the garage all winter. I also fixed a fuel leak from the top of the tank inside the trunk where the sending unit wasn’t tight against the fuel tank body. The picture of the can of polish is to show people what I use to polish my BBS RS wheels. It was recommended by Zane Coker (turbo E12 friend of mine, famous in the older BMW circles) as the best stuff for polishing wheels. And he’s right. It’s a huge PITA to polish them, but this stuff works wonders.
Finally, besides the lowered ride height in the front, some may notice that the outside mirrors are now black. I had received a new-old-stock passenger side mirror (so it was black, as they came from the factory) and I needed a driver side one to match. The problem was the new-old-stock one was perfect and a used driver side mirror was usually faded from the sun. So I had to get a new mirror to match but the result is worth it since the mirrors for all E12 M535i’s should be black. Mine were white since they were painted at one point in the car’s life during a repaint.
October 2007
To all the E12 owners out there wondering what their options are in the wasteland of performance suspension parts for their old 5-series, I can say this. Yes Virginia, H&R does make springs for the E12 5-series.
After years of E12 ownership and occasionally finding the rare set of Alpina springs for an E12, Racing Dynamics, a Hardy and Beck or Dinan set that might appear once every 3-5 years, and usually a whisper in the wind of E12 springs by Eibach which are long since NLA, I decided to research H&R springs for the E12. I called up H&R USA and they told me no, there was no such application in the system for an E12 5-series. That’s pretty much what I figured since H&R was never even a consideration for E12 springs that I knew of. At least I knew that at one point in time, Eibach had made springs for an E12.
When I was on the hunt for a set of German spec self-leveling specific springs for my E34 Touring, I discovered something. While working with my excellent contact at TireRack, Dean Hainey, I learned that H&R USA did not have access to all the part numbers that H&R Germany did. In this case, I had the part # for what I needed, but H&R USA knew nothing about it. With some help from Dean, we were able to get H&R USA to pass the order through to Germany and 8 weeks later I had my self-leveling H&R lowering springs.
This got me thinking; what about E12 springs since H&R USA already told me there was no such thing? I decided to go to the H&R main page in Germany and fortunately, there’s an icon with the British flag to convert to English. I went to the sport spring lookup, keyed in BMW, and lo and behold, there are E12 springs. Part #29533. The German website even has a PDF file of the TUV certification that you can download and view!
So with this in mind, I emailed Dean at the TireRack with my exciting news. The reply came a few days later after he spoke with H&R USA. No can do. They can’t guarantee that these springs will fit a US-spec E12 and therefore were unwilling to bring them in.
I was dumbstruck, but not beaten. The keyword US-spec E12 was what made me think this wasn’t dead yet. My M535i is a euro-spec E12, and it is even listed in the E12 fitment guide on H&R Germany’s website. I emailed Dean back with this info, offering to provide documentation of my car’s DOT importation to the United States and proof that it was euro-spec. H&R USA gave in and with the understanding that this was a special-order with no returns, TireRack ordered part #29533 for me on April 26th, 2007.
I waited, and waited, and no springs. Not the 8 weeks like the E34 spring set, but this time it was 22 weeks! Wow. Dean had no idea why it took so long, but I wasn’t in a huge rush anyhow. I’m pretty happy with the Racing Dynamics springs I have on the car now (with one full coil cut off the fronts) to get the lowered stance I wanted. Moreover, I invested in an alignment at the BMW dealer in the late Spring so I wasn’t sure what I would do with these H&R’s when they came anyway.
The picture tries to show their size next to a ruler for anyone else contemplating getting them. Dean at the TireRack is pretty sure they won’t do this again for anyone with a US-spec E12, but you can try. At least we know they are out there, and they cost the same as any other basic H&R spring set from the TireRack (aka slightly more than the normal only-game-in-town E12 spring, Suspension Techniques).
October 2007
These videos have been around for a little while, but I wanted to post these links. They are the best shots I have of my car in motion and were taken by E28 owner Patrick McHugh on our way to 5er Fest in May 2007.
Summer 2008
At long last, after searching pretty much since I bought my E12 M535i, I found a complete headlight cleaning system in good shape. Sadly, another E12 M535i donated this as it was found in a junkyard in California. I was able to tell JayM (from mye28.com) to go back to the yard after he got the motors and wipers and retrieve the special dual pumps for the washer container and all the wiring plus relays. I have everything I need to get this in the car and working.
Unforunately this came during the time we were in transition from our move to Minnesota from Chicago, so I had to install this and do a lot of the prep work at my mother-in-law’s garage where the e12 was in storage. I had a local machinist blast the headlight buckets for me and I painted them with black POR-15 to guarantee against rust. I also sucked it up and bought new, OEM, euro headlight washer wiper grilles from the local dealer. OUCH. The ones that came with the set had some cracks and were very gray from the age of the plastic. I also need to get a few more items to really get this in top shape including the covers for the backs of the headlights in the engine bay (specific to this setup so the motors can pop through), new wiper blades, and a few other odds and ends. For now they are only mounted for show but one of the winter projects in my new garage is to get them wired in.